How to Use Relay Timer v2.0
Fully Programmable Timer for ProXR Relays
| Set COM Port |
 |
| Turn On/Off Relay Manually | |
| Turn On/Off Relay Automatically | |
| Customize Relay Status | |
| Rapid Buttons |
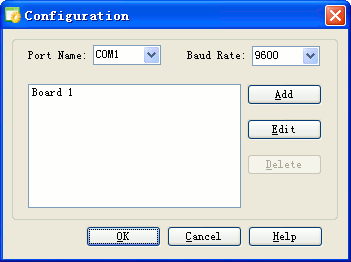
In order to control your device with Relay Timer, be sure to connect NCD relay board with your computer and connect your device with NCD relay board at first, then set the port as below.
Click Windows Start Menu -> All Programs -> Relay Timer -> Configuration
The Configuration dialog will be opened.
Select Port Name and Baud Rate. Board 1 is the main board to connect with the selected COM Port.
Other boards can be added here, which connect with Board 1. It supports up to 16 boards. However, only two boards can be added in a trail version.
Click OK to finish setting.
The light on top right of relay control panel indicates the status of the relay.
Red is for relay off. Green is for relay on.
Click
button down
to step into manual operation mode.
Click the slider
to turn on the relay. The light becomes green.
Click the slider
to turn off the relay. The light becomes red.
Turn On/Off Relay Automatically
The default mode is auto mode. The schedule of the relay action must be set at first.
Click
button on the relay control panel to open Relay Setting dialog.
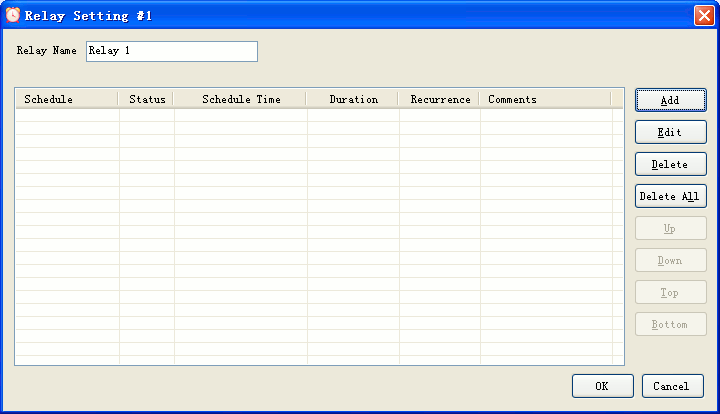
The relay can be given a name here.
Click Add button to open Schedule Setting dialog.
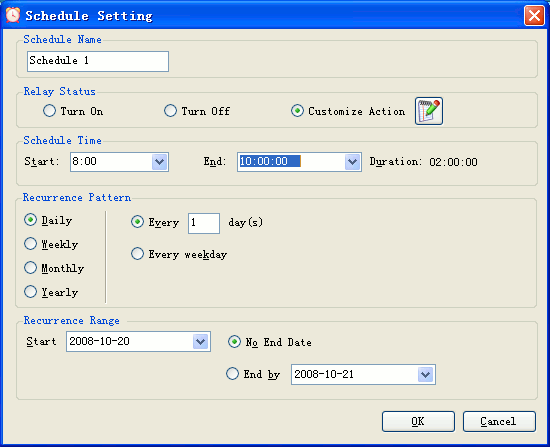
Edit the Schedule Name, select Relay Status, set Schedule Time, select Recurrence Pattern and Range .
Click OK to return Relay Setting dialog.
Different schedules can be added by this way.
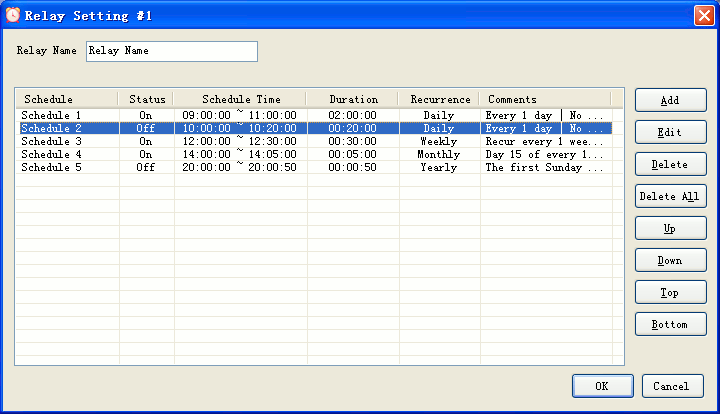
Click OK to finish relay setting.
The relay will be turned on automatically according to the setting.
The status of relay can be customized except only on or off.
For example, relay can be on 10 minutes, off 5 minutes within one hour, and on 20 minutes and off 10 minutes within the other one hour. This can be set as steps below.
Step1. Click
button on the relay control panel to open Relay Setting dialog.

Step 2. Click Add button to open Schedule Setting dialog.

Edit the Schedule Name, set Schedule Time(2 hours), select Recurrence Pattern and Range .
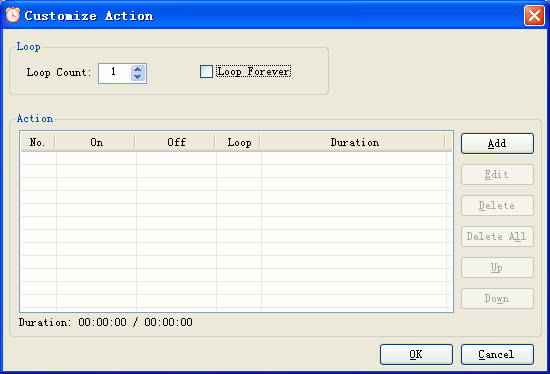
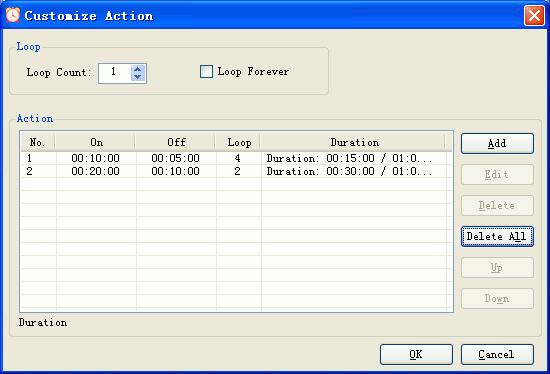
Step 3. Click Customize Action or the edit button beside it to open Customize Action dialog.
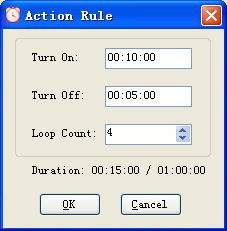
Step 4. Click Add button to open Actcion Rule dialog.
Set Turn On 10 minutes, Turn Off 5 minutes and Loop Count 4.
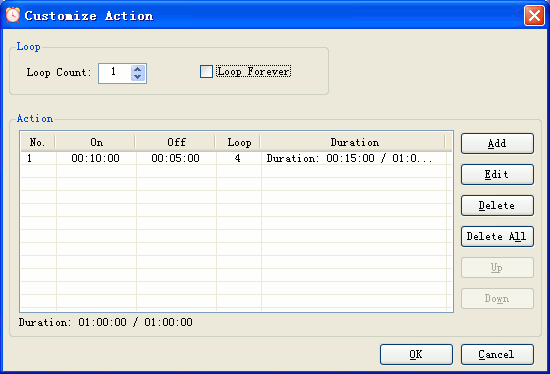
Click OK to return Customize Action dialog. The action will be shown in the list.
Step 5. Click Add button to open Action Rule dialog again.
Set Turn On 20 minutes, Turn Off 10 minutes and Loop Count 2.
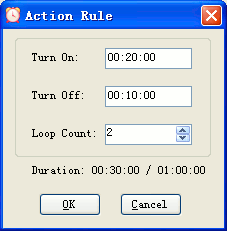
Click OK to return Customize Action dialog.The action will also be shown in the list.
Click OK button to return Schedule Setting dialog and then return to Relay Setting dialog.
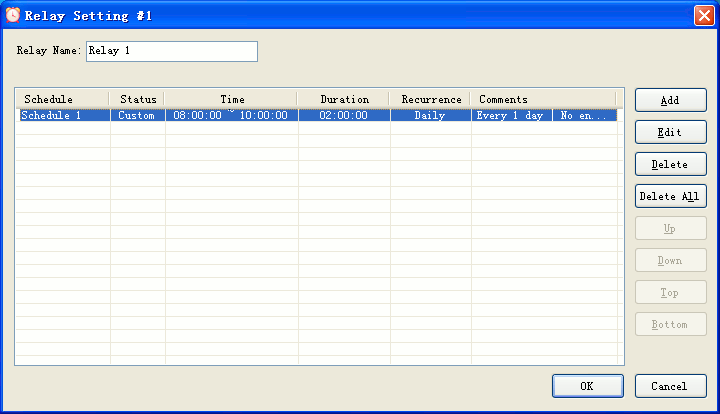
Click OK to finish relay setting.
The relay will be turned on/off automatically according to the customized setting.
Click to load a *.cfg file to get settings of all relays. Click to save settings of all relays to a file (*.cfg) Click to turn all relays off. Click to turn all relays on. Click to invert all relays. Click to set all relays in auto mode. Click to load a *.ptn file to set status of all relays. Click to save current status all relays to a file (*.ptn)

