
Wireless Contact Closure Relay at a Glance...
- Sold in Pairs
- 1 Relay on Each Board
- 1 Contact Closure Input on Each Board - Each Device Controls the Other Device
- Local Input Control Remote Relays
- Remote Input Control Local Relays - Wireless Operation up to 2 Miles (3.2 kilometers)
- Line-Of-Sight Operation - No Computer, No Programming, No Set-Up
- Works Together Right Out of the Box!
Control Without Pulling Wire
Wireless MirX controllers give you instant contact-closure mirroring without running cables, trenching, or rewiring. Set them up once, and they stay synced - simple, reliable, and ready for real-world automation.
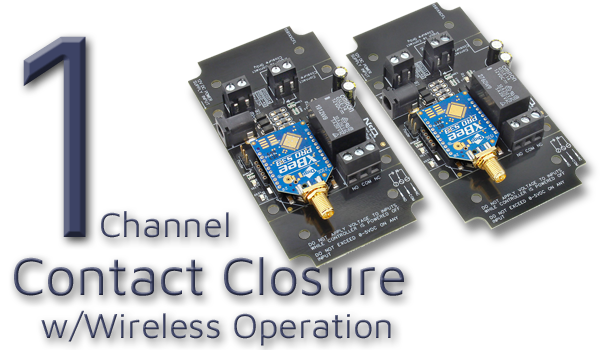
Contact Closure Relay
The MirX Contact Closure Relay system is sold as a pair of identical boards. Each board includes both contact closure input and onboard relay - the inputs on one board control the relays on the other. This creates a simple and flexible way to control devices in both directions between two locations using a 900 MHz Wireless connection.Unlike traditional sender/receiver systems, both MirX boards can send and receive - giving you true two-way control right out of the box.
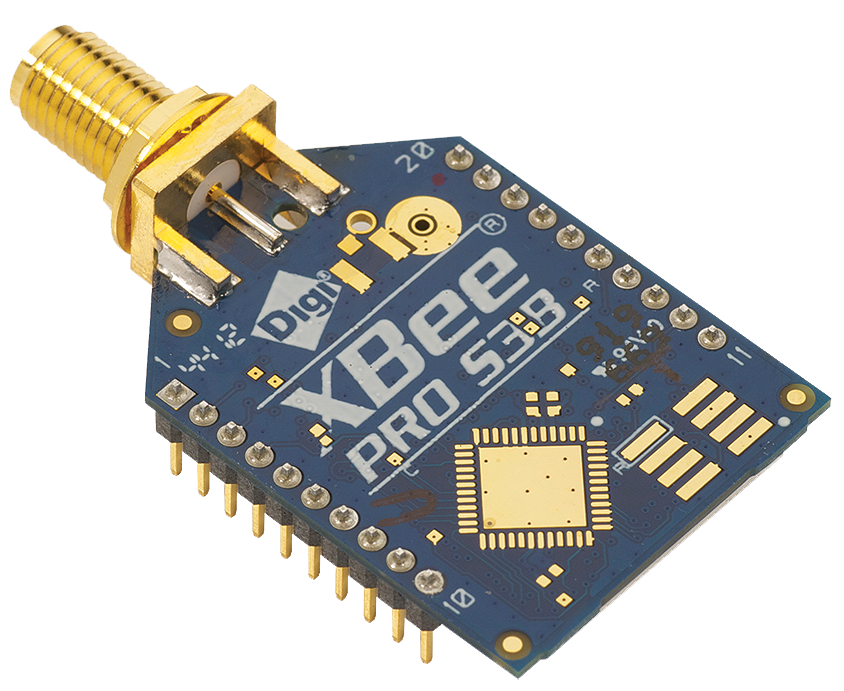
XBee-PRO 900 RF Module
Both Boards feature a 900HP wireless module operating at 900 MHz. This module provides a reliable wireless link with a line-of-sight range of up to 2 miles (3.2 km), enabling dependable remote control in a wide range of applications.Step-by-Step Connection Guide
- Connect Your Device:
- Wire the contact closure output of your device to the input terminals on either Board
- Power Both Boards:
- Apply 12VDC Power to both Boards
- Wireless Linking:
- The 900HP wireless modules automatically establish the long-range communication link (no configuration required in wireless MirX systems)
- Use the Relay Output:
- Wire the relay contacts on the Opposite Board to the circuit or equipment you want to control at the remote location
- Trigger the Closure:
- When the contact closure activates at the Board, the Opposite Board's relay mirrors that state almost instantly
Choosing the Right Relay Amperage
The 1-Channel MirX boards include one dry contact input and one relay output on each Board. The key difference between the options is the amperage rating of the relay installed. Select a board that matches the amperage required for your application.- SPDT relays are available in 5-Amp, 10-Amp, and 20-Amp versions.
- An SPST relay is available in a 30-Amp version.
💡 Relay Pros ProTip:
If you're controlling high-current loads like motors or heaters, always choose a relay with extra amperage headroom. Running a relay at its maximum rating can shorten its lifespan.


