
Contact Closure Over IP at a Glance...
- System Configuration
- Sender Board Remotely Controls the Receiver Board
- Sold as a Matched Pair
- 1 Contact Closure Input on the Sender Board
- 1 Relay Output on the Receiver Board
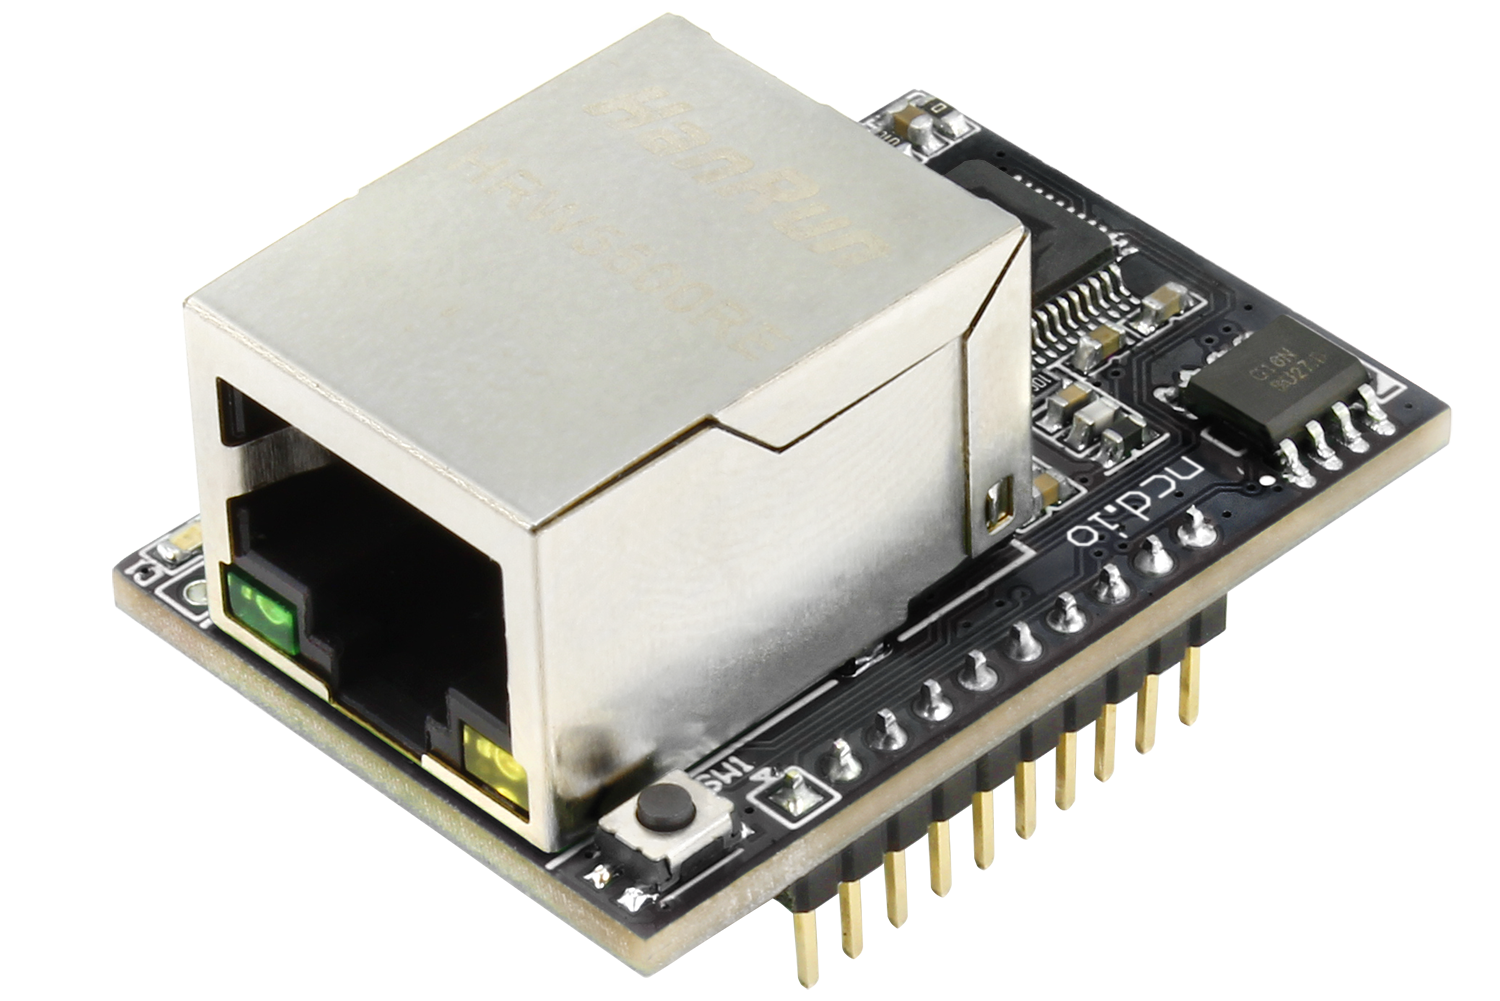
- Network Connectivity
- Plugs Into Your Router
- Contact Closures Across Your LAN
- Static IP Required for Reliable Communication
- Sender Board Shows Status of Relays
Reliable Contact Closure Over Your LAN
Ethernet MirC controllers mirror contact closures anywhere on your LAN - no long wire runs, no trenching, no headaches. If it's on the network, it's in range - the network handles the transport, you get predictable results.
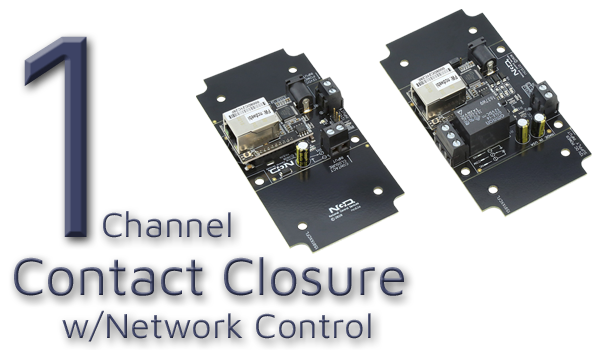
Contact Closure Over IP
Control relays remotely over your local network with MirC MCNET boards. Each pair includes a Sender Board and a Receiver Board. The sender accepts contact closure (no voltage) input, which instantly control the a relay on the receiver board providing seamless, network communication between two points. The receiver's relay can switch power or act as a dry contact. Easily assign IP addresses to operate across subnets - no internet needed. Boards plug directly into your router; setup requires a managed network, but they work on unmanaged networks after configuration. Perfect for extending contact closures over any distance with simple, reliable network control.Contact Closure Input & Output
Step-by-Step Connection Guide
- Connect Your Device:
- Wire the contact closure output of your device to the input terminals on the Sender Board
- Power Both Boards:
- Apply 12VDC Power to both the Sender and Receiver Boards
- Ethernet Connectivity:
- Boards plug directly into your router; initial setup requires a managed network
- Use the Relay Output:
- Wire the relay contacts on the Receiver Board to the circuit or equipment you want to control at the remote location
- Trigger the Closure:
- When the contact closure activates at the Sender Board, the Receiver Board's relay mirrors that state almost instantly
Choosing the Right Relay Amperage
The 1-Channel MirC boards include one dry contact input on the Sender Board and one relay output on the Receiver Board. The key difference between the options is the amperage rating of the relays installed. Select a board that matches the amperage required for your application.- SPDT relays are available in 5-Amp, 10-Amp, and 20-Amp versions.
- An SPST relay is available in a 30-Amp version.
💡 Relay Pros ProTip:
If you're controlling high-current loads like motors or heaters, always choose a relay with extra amperage headroom. Running a relay at its maximum rating can shorten its lifespan.


